The Squad Leader directs squad-level operations, coordinating movement, cohesion, communication, and fires. They maintain situational awareness through the B-TAK system, ensuring their squad operates effectively with the rest of the platoon.

The information and procedures in this document are intended solely for the video game Bellum and are not meant for real-world medical or tactical use. This guide is designed to be read from start to end, providing new players to the genre with a structured walkthrough of the core systems, mechanics, and concepts needed to understand and enjoy Bellum.
Bellum is under active development, and portions of this guide may evolve as the game continues to develop. Future revisions will reflect system updates, balance changes, and community feedback.
Welcome to Bellum.
This guide serves as an introduction for new players beginning their journey in Bellum. It outlines the core mechanics, gameplay principles, and the key differences that set Bellum apart from traditional first-person shooters.
Unlike most FPS titles, Bellum values deliberation over speed, cohesion over individualism, and consequence over convenience. Every system — from medical treatment to communication and platoon organization — is designed to reinforce coordination, teamwork, and situational awareness. Success is not defined by individual performance, but by how effectively your element operates as a unified force under pressure.
Bellum is more than a game — it is a collaborative effort between developers, veterans, and players who share a passion for pushing tactical gaming to its limits. It stands as an ongoing pursuit of authenticity, immersion, and meaningful combat experiences. We sincerely thank you for being a part of that journey.
1-1Bellum is a tactical first-person shooter that places a strong emphasis on communication and player-driven teamwork. Set amid a fictional near-future conflict across Africa, it places players in the midst of intense operations between conventional and unconventional light infantry forces. Featuring factions such as the American Ranger Regiment, the Russian SATYR PMC, and the al-Zalaam guerrilla forces, Bellum offers players a range of distinct combat styles and engagement tempos.
1-2Unlike arcade-style shooters, Bellum does not reward reflex alone. It encourages positioning, teamwork, and coordination. Every decision carries weight, from how you maneuver and engage the enemy to how you approach each firefight as part of a team. Bellum is designed to provide the freedom and fidelity for players to apply authentic tactics, while preserving depth and complexity across game systems. The goal is to emphasize realism not as an obstacle, but as an opportunity for creativity and skill expression.
1-3Players entering Bellum for the first time should expect a challenging learning curve. Situations can be fast-paced, communication channels might seem overwhelming, and identifying friend from foe takes practice. The battlefield is intentionally complex and players must rely on coordination and communication to make effective decisions. Every playable role serves a specific purpose with unique capabilities and responsibilities. Effective players focus on mastering both their role-specific capabilities and core soldiering skills, rather than relying on gamified mechanics.
1-4The fog of war is a constant presence within the area of operations, requiring players to maintain awareness and cohesion with friendly elements. Firefights can erupt with little warning, often overwhelming those who are unprepared or inattentive. Even as engagements unfold, players will often have difficulty identifying the precise source of incoming fire or visually see the enemy. This is part of Bellum’s authentic design. In these moments, the element’s formation and level of preparation will heavily influence the outcome. Teams that maintain spacing, positioning, and awareness are far more likely to regain control of the situation than those caught disorganized or exposed.
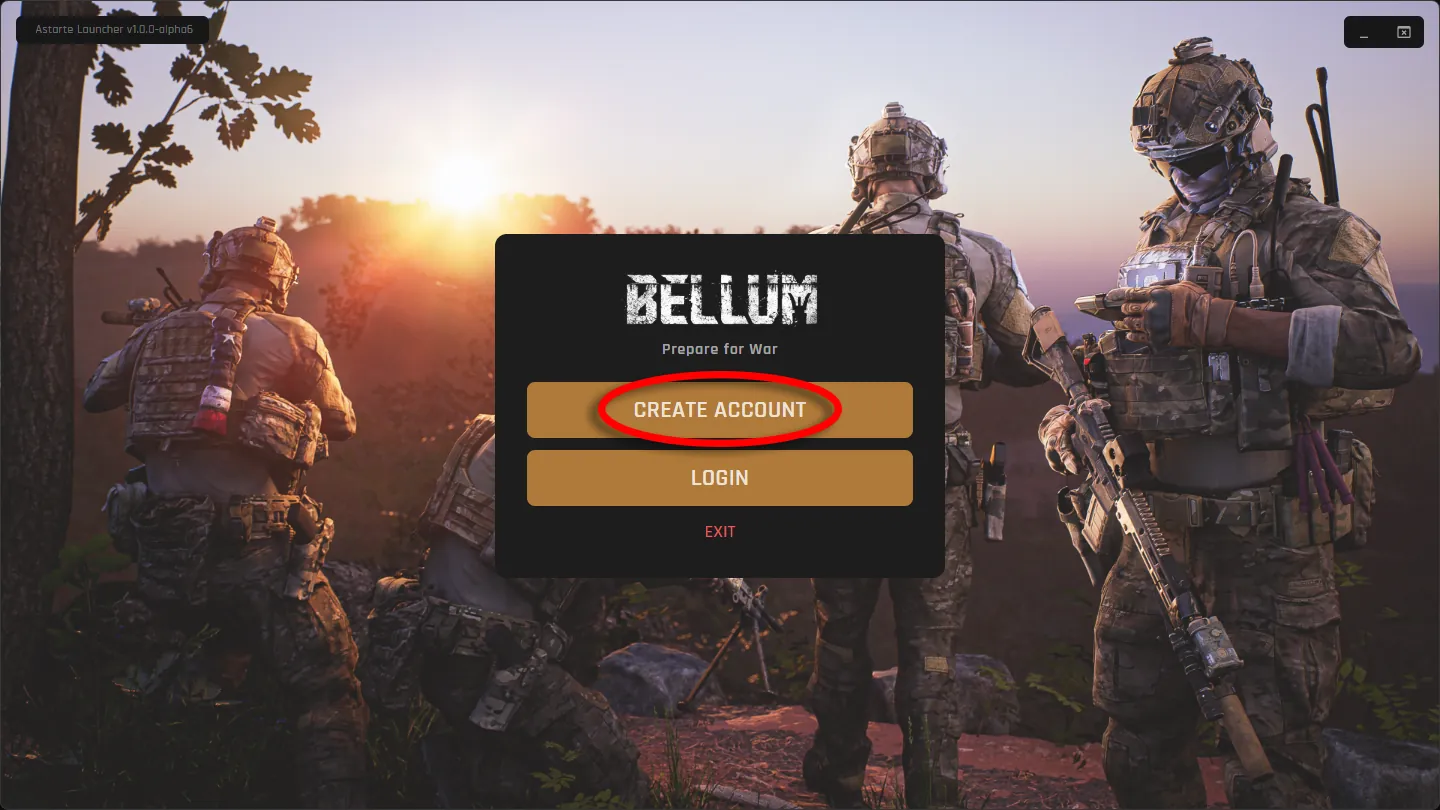
2-1After downloading and installing your launcher you will be prompted to create an account or login. Assuming you have never created an Astarte account before, simply click Create Account. You will be able to recover, change your password, email, and display name later. Game keys are sent to the email used when purchased. If you cannot find your game key, reach out to Astarte Support via email at support@astarte.industries or Discord https://discord.gg/playbellum.
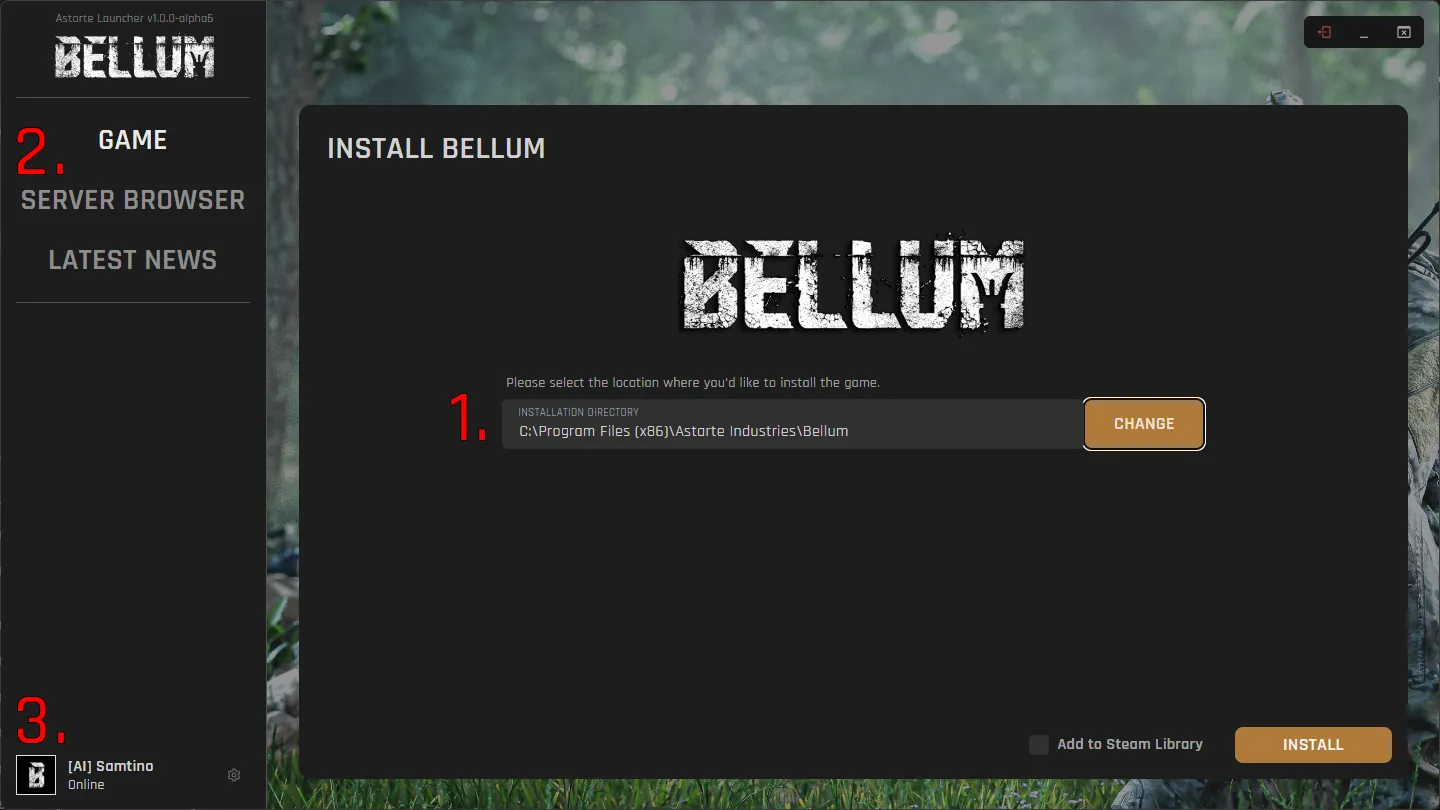
2-2After successfully creating your account you will be directed to install Bellum. Here you can install Bellum (1), view the server browser (2), or edit your account (3). When installing Bellum please ensure to do so on your fastest drive possible, NVME SSD > Standard SSD > HDD, as drive speed can affect performance.
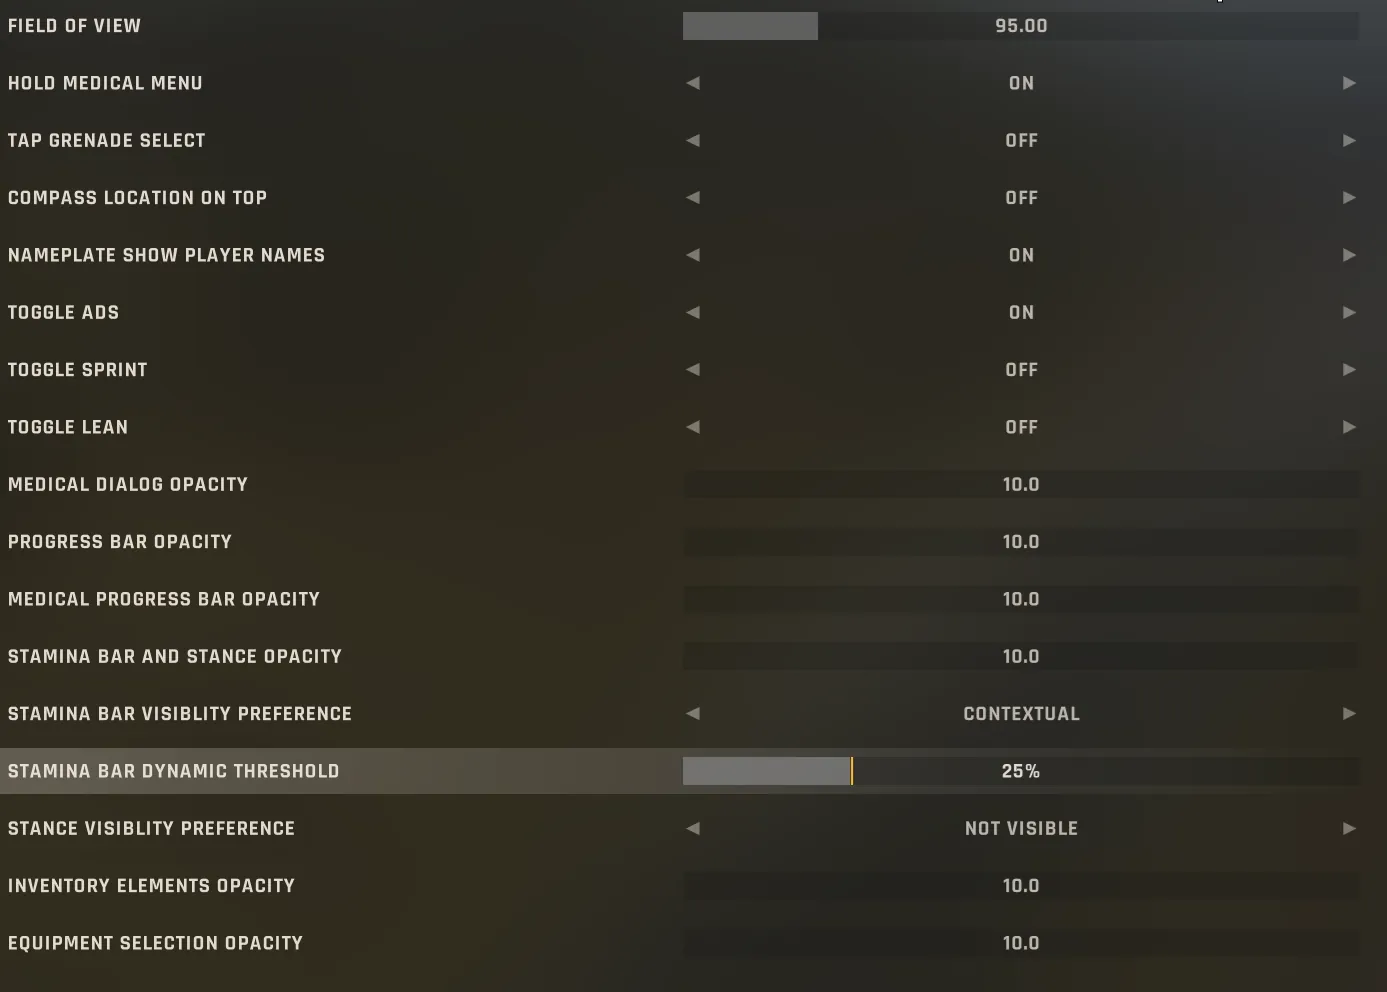
2-3Now that you have Bellum installed we highly recommend launching the game and visiting the settings menu. The Gameplay Settings section features many contextual UI elements that players can either enable or disable depending on their experience level. Bellum is designed to be played with as little HUD as possible for the most immersive experience. We highly recommend taking the time to tweak these settings to your liking.
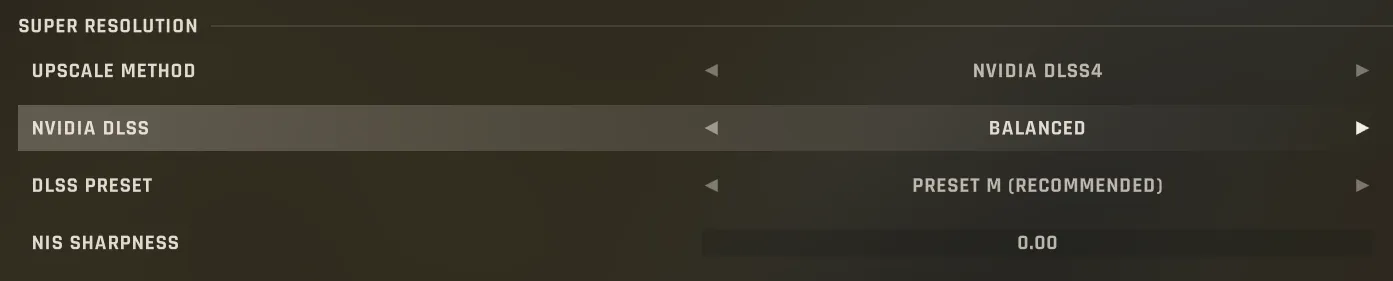
2-4In the Video Settings section we recommend playing in Fullscreen mode for the best performance and to avoid using the Epic preset unless you have an extremely powerful computer. The next most impactful change to make in this settings page is to enable either TSR or DLSS in the upscaler settings. We have found that this significantly reduces the amount of ghosting players may experience. Please note that further improvements and work is still planned for optimization and visual fidelity.
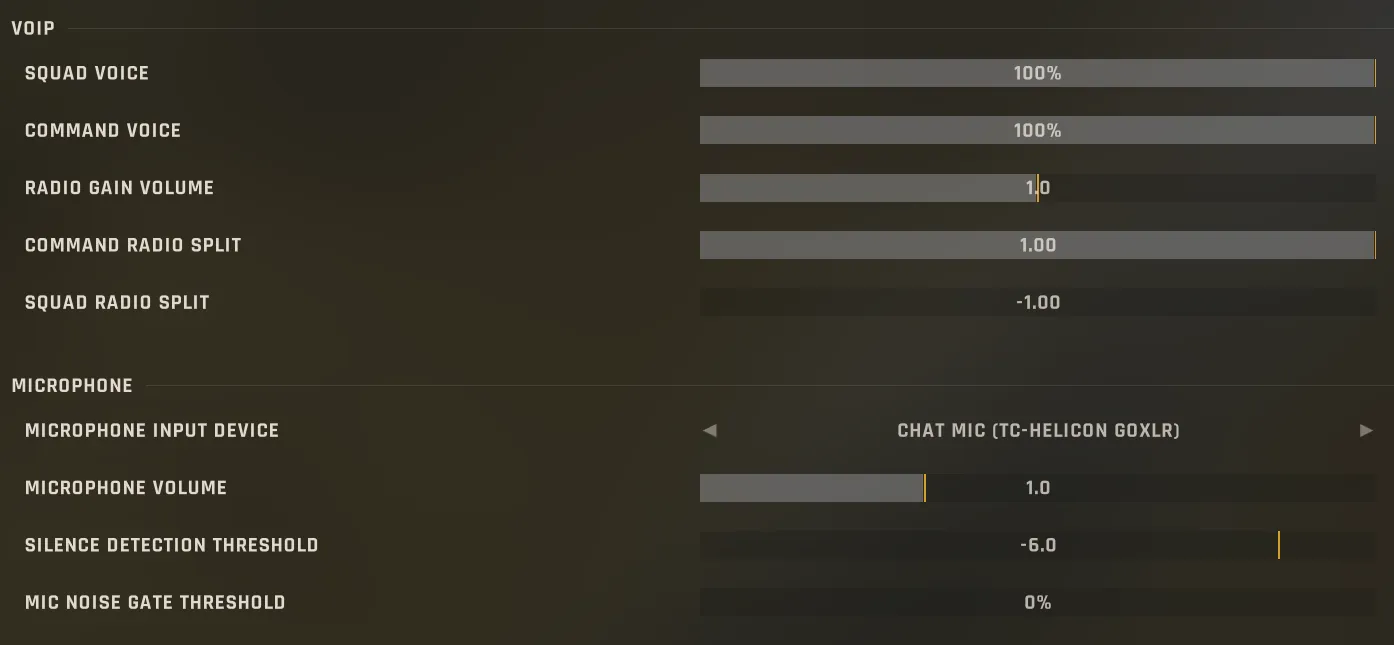
2-5In the Audio Settings section, please ensure that the correct microphone is selected. Please note that VOIP in Bellum is normalized automatically by the game. Local voice volume is managed by this automatic normalization, meaning that there are indeed times where voices will be drowned out by the chaos of firefights. In this section you will also find additional squad and command radio settings to include volumes and ear panning.
https://astarte.launcher.link/download
Install on your fastest drive available. NVMe SSD > SATA SSD > HDD — drive speed materially affects in-game performance.
3-1The Astarte Industries launcher allows players to join servers directly from the application. Simply select the server you wish to join and click Join Server Queue. Note that players can attempt to join 3 servers simultaneously, joining the first server with room. The game application will automatically launch and join the server.
3-2Players can also launch their game manually from the Game screen of the launcher and browse servers while in-game.
Players may queue for up to 3 servers simultaneously — the first to open a slot wins.
4-1The Deployment Menu is where players select their squad/role (1.), and spawn location (2.). From this screen players can also see the current tactical map (3.), spectate their squadmates (4.) and talk with other undeployed squadmates by using the [B] hotkey.
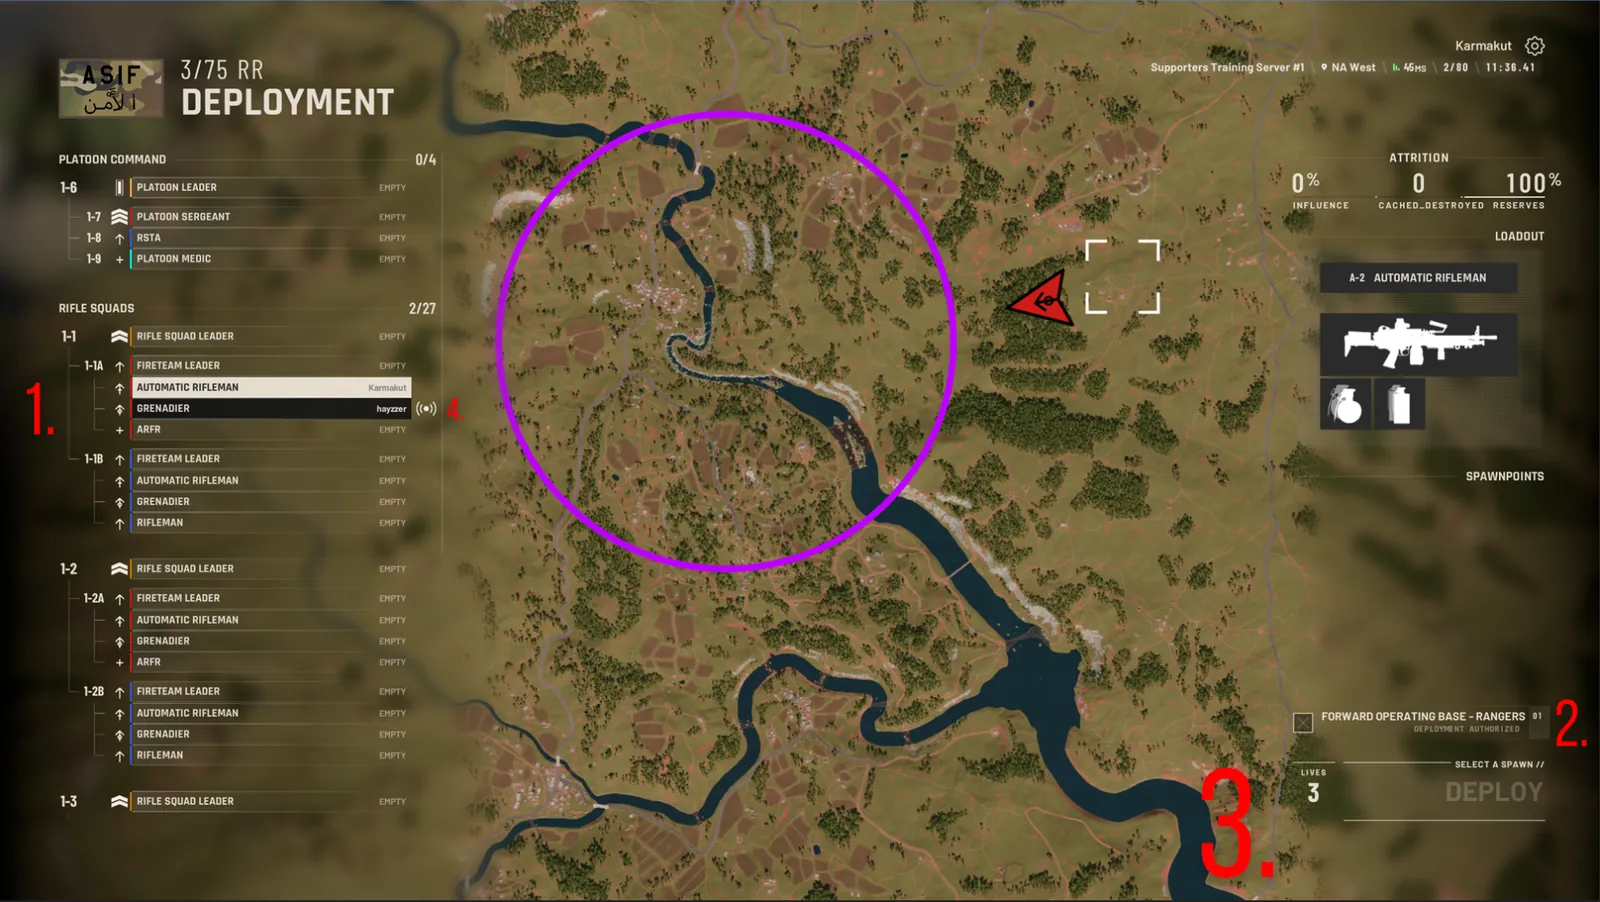
4-2On the left side of the Deployment Menu, players can select the squad and role they’ll assume for the match. These selections become locked once the staging period ends. Until then, players are free to adjust their loadouts or change roles. To maximize combat effectiveness, it’s recommended that players fill out existing squads rather than forming multiple small fireteams. Larger squads enable more assets and maintain greater staying power within the Area of Operations. Fireteams unlock sequentially, meaning each must be fully manned before the next becomes available.
4-3On the bottom right of the Deployment Menu, players can select their possible spawn locations. These range from the Forward Operating Base, Leadership Reconstitution options, and team constructed objectives. Here you will also see the amount of lives you have remaining in a match, the respawn time you have to wait before spawning in, and any possible conditions preventing your ability to spawn.
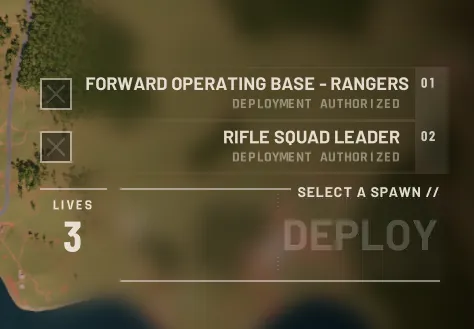
5-1Icons displayed here are grey for readability. In-game they are color coded to specific fireteams.



5-2As a new player, it’s recommended to start with a role that is simple and easy to manage. This helps beginners to focus on learning the fundamentals without overburdening themselves or their squad. Good starting roles include Rifleman, Grenadier, and Automatic Rifleman. These positions are straightforward to play while still offering useful capabilities such as indirect fire and suppressive support. If you’re looking for a slightly more specialized role, Gun Team Leaders, Anti-Tank Gunners, Machine Gunners and Medics introduce a few additional mechanics and responsibilities to learn. Leadership roles, such as Squad Leader or Fireteam Leader, should generally be reserved for players with more experience and familiarity with Bellum’s communication systems and tactical flow.
6-1Movement in Bellum follows the standard control scheme familiar to most first-person shooters. [WASD] controls directional movement, [C] toggles crouch, and [Z] sets the player to a prone position. Additional standard movement options include leaning bound to [Q] and [E] as well as sprinting bound to [Left Shift]. Bellum also offers fine control over movement speed using the [Mouse Wheel]. Scrolling the [Mouse Wheel Up] increases movement speed, while scrolling the [Mouse Wheel Down] slows the player. This allows players to precisely manage pacing in response to their surroundings.
6-2As with most systems in Bellum, every choice carries trade-offs. Moving quickly provides greater mobility but increases weapon sway and movement noise, reducing accuracy and stealth. Moving slowly offers greater stability and quieter movement but limits responsiveness and maneuverability. Successful players learn to adjust speed dynamically, balancing control and concealment as the situation demands. The hotkey [CAPS] also allows players to instantly switch between their current move speed and the lowest movement speed, providing stability and decreasing their sound profile at a moments notice.
6-3In addition to managing speeds, players can also manage how high or low they wish to crouch. This is accessed via holding the [C] key simultaneously with scrolling the [Mouse Wheel Up/Down]. Variable crouch allows players to adjust their height to the obstacles around them to minimize their exposure. Keep in mind that in general stance like crouch and prone also affect the stability and recoil of most weapons. Crouch offers a smaller bonus to stability and recoil while prone enhances these boons further.
6-4Just like the movement controls, weapon controls in Bellum should feel familiar and intuitive. Standard hotkeys include [LMB] to fire, [RMB] to aim down sight, [R] to standard reload, [RR] to quick reload, [1] to change primary firemode, and [G] to equip grenades.
6-5Bellum does sport a few custom weapon controls including a Mag/Munition check action to see how many rounds you have left with [CTRL+R], a grenade radial selection menu with [HOLD G], high ready to avoid friendly flagging with [SPACEBAR], and an option to check your current fire mode with [CTRL+F].
6-6All players in Bellum also have access to a few universal equipment keybinds. Equip Item Controls - [1] Equip Primary Weapon - [2] Equip Secondary Weapon - [3] Equip Special Role-Specific Weapons (such as grenade launchers or rocket launchers) - [4] Equip Special Role-Specific Equipment (such as breaching devices or demolition charges) - [CTRL+T] Checks Remaining Inventory Item Counts (mags, grenades, etc) Communication Controls - [V] accesses your proximity communication transmitting your voice to all friendly players within a close range. This is the primary mode of communication between players whenever possible to avoid radio clutter. - [B] transmits to the player’s immediate squad channel and is available to every player. This is typically used to communicate across fireteams and to the Squad Leader, when the recipient is outside of proximity voice range. - [N] opens communication to the platoon leadership, including Squad Leaders AND Fireteam Leaders. This channel is used to share OPFOR sightings, friendly situation updates, and coordinate inter-squad maneuvers. Watch/B-TAK Controls - [TAB] brings the smart watch to the center of the screen for better visibility and enables the zoom function when combined with [Mouse Wheel Up/Down]. - [TAB+MWU/MWD] zooms the smart watch in and out as desired. - [M] opens the player's B-TAK phone device. This device allows for squad management, texting capabilities, marking options, and interacts with other systems like helmet cams and drone feeds. All Keybinds Movement Keybinds Movement WASD Lean Left/Right Q/E Sprinting Shift Crouch C Toggle Run/Walk Capslock Variable Crouch C + Mouse Wheel Vault/Climb/Drop Hold Spacebar Variable Walk WASD + Mouse Wheel Prone Z Weapon Keybinds Fire Weapon LMB Aim Down Sight RMB Standard Reload R Mag/Munition Check CTRL + R Fast Reload Double Tap R Equip Grenade G Zeroing Up X+MWU Grenade Menu Hold G Zeroing Down X+MWD High Ready Spacebar Change Fire Mode 1 Check Fire Mode CTRL+ F Equipment Keybinds Proximity Voice Hold V Primary Weapon Squad Radio Hold B Secondary Weapon Command Radio Hold N Special Weapon Options Menu Escape Special Equipment Look at Watch Hold Tab Check Equipment CTRL+T Open B-TAK Map M Zoom Watch In/Out Tab + Mouse Wheel Medical Keybinds Medical Menu Hold H Apply Tourniquet LMB on Limb Apply Stimulant MWU Anywhere Apply Bandage RMB on Body Part Apply Depressant MWD Anywhere Apply Blood Bag MMB on Limb
| MOVEMENT | |
| Movement | WASD |
| Lean Left / Right | Q / E |
| Sprint | Shift |
| Crouch | C |
| Toggle Run / Walk | Capslock |
| Variable Crouch | C + Mouse Wheel |
| Vault / Climb / Drop | Hold Spacebar |
| Variable Walk | WASD + Mouse Wheel |
| Prone | Z |
| WEAPON | |
| Fire Weapon | LMB |
| Aim Down Sight | RMB |
| Standard Reload | R |
| Mag / Munition Check | Ctrl + R |
| Fast Reload | Double-Tap R |
| Equip Grenade | G |
| Grenade Menu | Hold G |
| Zeroing Up | X + MWU |
| Zeroing Down | X + MWD |
| High Ready | Spacebar |
| Change Fire Mode | 1 |
| Check Fire Mode | Ctrl + F |
| EQUIPMENT | |
| Primary Weapon | 1 |
| Secondary Weapon | 2 |
| Special Weapon | 3 |
| Special Equipment | 4 |
| Check Equipment | Ctrl + T |
| Options Menu | Esc |
| COMMUNICATION | |
| Proximity Voice | Hold V |
| Squad Radio | Hold B |
| Command Radio | Hold N |
| WATCH / B-TAK | |
| Look at Watch | Hold Tab |
| Zoom Watch In / Out | Tab + Mouse Wheel |
| Open B-TAK Map | M |
| MEDICAL | |
| Medical Menu | Hold H |
| Apply Tourniquet | LMB on Limb |
| Apply Bandage | RMB on Body Part |
| Apply Stimulant | MWU Anywhere |
| Apply Depressant | MWD Anywhere |
| Apply Blood Bag | MMB on Limb |
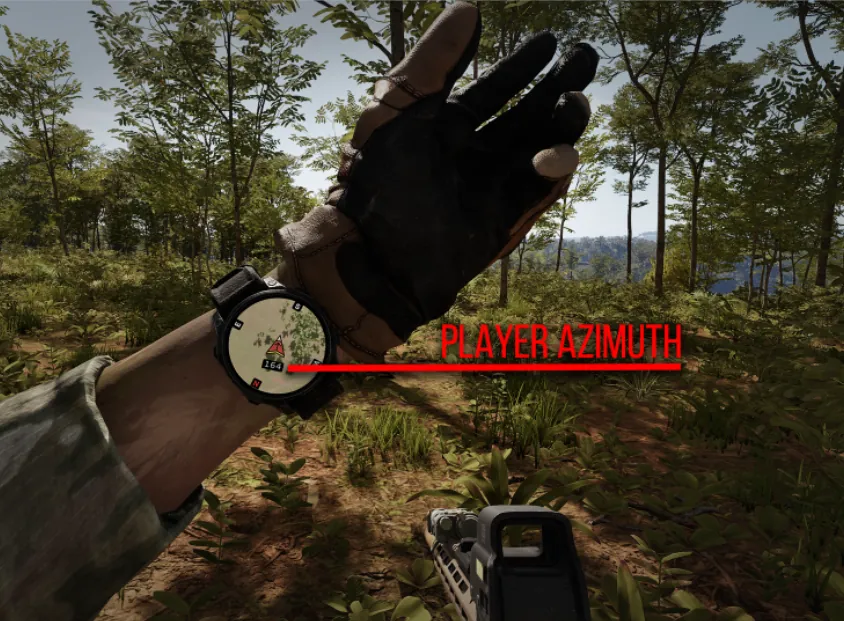
7-1Every player in Bellum is equipped with a GPS watch that provides diegetic positional awareness within the Area of Operations. The watch displays the player’s immediate surroundings, serving as a vital tool for orientation and navigation during combat. By default, pressing [Tab] brings the watch to the center of the screen for improved visibility. While viewing, players can adjust their situational scope using [Mouse Wheel Up] and [Mouse Wheel Down] to zoom in or out as desired. Players can view the exact azimuth they are facing at the center of the watch display.
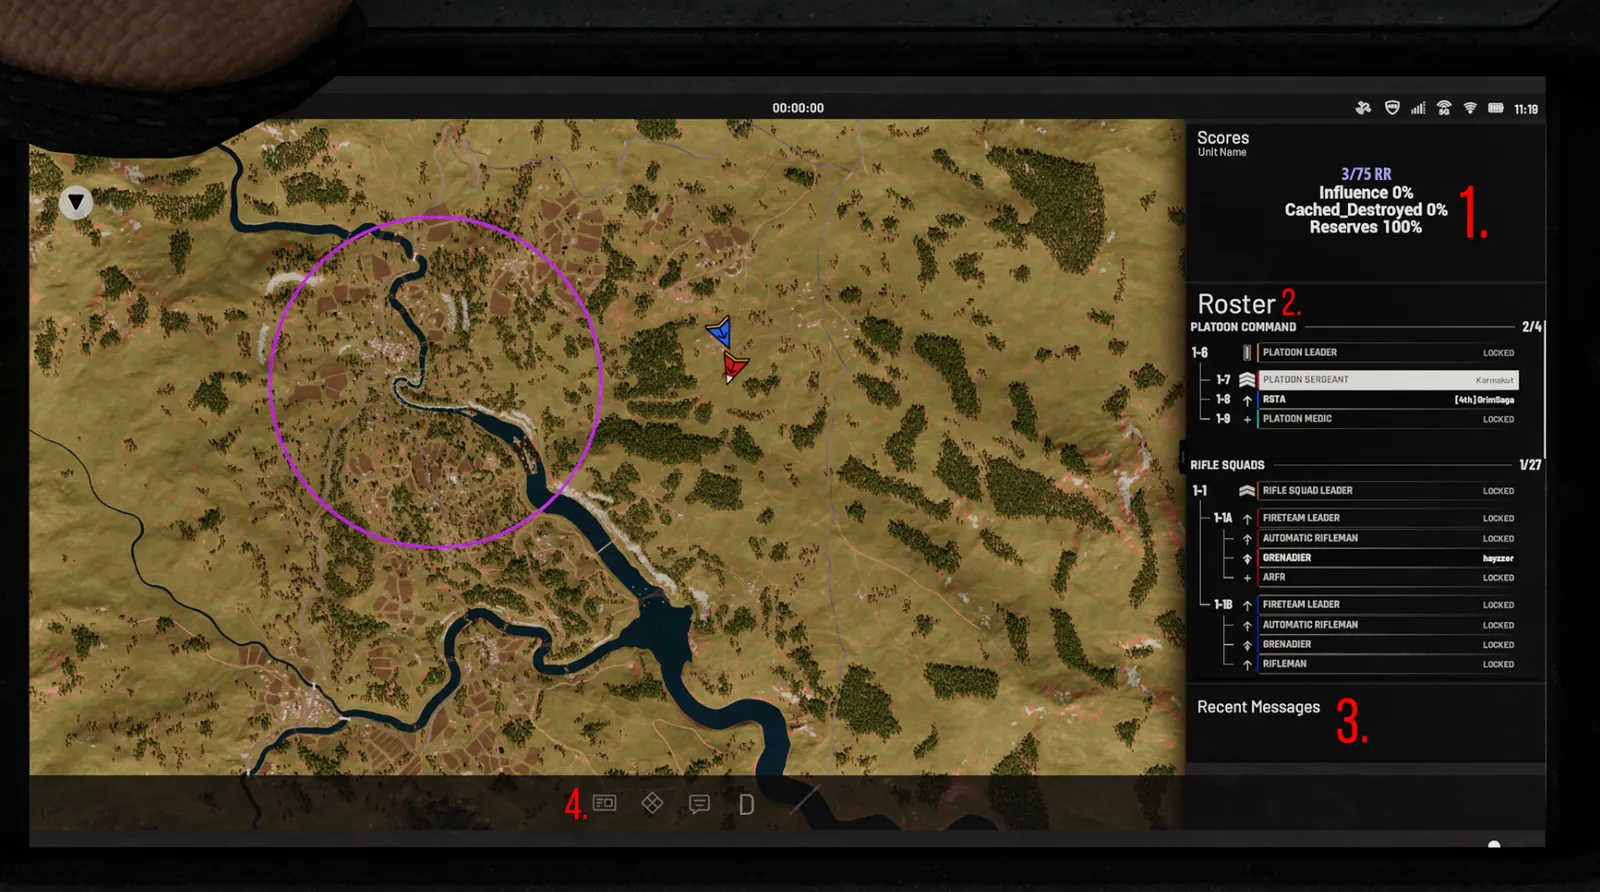
7-2Each player in Bellum carries a mobile device equipped with B-TAK functionality, providing a digital extension of the unit’s battlefield awareness. The device is accessed using [M] by default. On the main B-TAK interface, players can view the status of their team’s win conditions (1.), their team’s roster (2.), and recent chat messages (3.). Players can access more dedicated map marking and chat interfaces by using the navigation menu on the bottom (4.).
7-2Keep in mind that when viewing the B-TAK or your watch, only members of your own squad appear as individual triangular icons. External fireteams and squads are represented as unit-level boxes instead. This design is intentional, reinforcing fog of war and encouraging teamwork, communication, and deliberate decision-making.
“The secret of war lies in the communications.” — Napoleon Bonaparte
8-1Bellum features three primary communication channels available to players. All players can communicate through Local Proximity and Squad channels, while Fireteam Leaders and Squad Leaders also gain access to the Platoon Net, enabling coordination across the entire element. Keep in mind that when players are unconscious they cannot speak at all, and that dead players can only communicate with other dead squadmates via the [B] hotkey.
Remember your ABCs — Accurate · Brief · Clear.
9-1Players in Bellum possess a set blood volume, which represents their total health. The Health Menu can be accessed by holding the [H] key until the Medical Radial Menu appears. When looking at another player, holding [H] opens their medical interface (when prompted). Holding [H] without a target selected opens your own. The outer ring of the menu displays the target’s overall condition progressing from Green (Good Condition), to Red (Critical Condition), to Black (Grace State). You cannot open the Medical Radial Menu on players who are dead. Hovering the cursor over specific body panels provides detailed information about injuries, affected areas, and potential treatment/equipment options.
9-2On screen visual effects are also used to communicate the player’s health status. Lower blood values cause screen desaturation, severe wounds cause additional blood effects, and pain intensifies on screen blur.
Standard state. Full access to all role abilities, movement, and communication. Slow blood regeneration with no active wounds.
Ragdolled. Cannot move. Stripped of most abilities — but can still talk on local & radio and check own health with [H].
Helpless. No abilities, cannot look or speak. Solid black visual with occasional eye flicker. Chance to regain consciousness based on overall health.
Activates when blood reaches zero. Lasts 300 seconds. Player can be stabilized within this window. Cannot be affected by drugs. Vulnerable to additional injury.
Grace timer expired. Lose a life. Sent to the deployment screen to select a new spawn location.
Immediately staunch all bleeding from a limb. Apply with LMB on Limb. Convert to bandages as situation allows — long use raises pain & unconsciousness risk.
Permanent wound treatment. 3 sec per wound, max 10 wounds per body part. Apply with RMB on Wound.
Temporarily improve blood condition & reduce pain for 2 minutes. Apply with MWD while in radial menu.
Wake patients from the Unconscious state. Apply with MWU while in radial menu.
Heal-over-time transfusion. Apply with MMB on Limb. Won't flow through tourniqueted limbs. Multiple bags can run simultaneously.
10-1Player lives in Bellum are limited based on faction type and role selection. Conventional Factions receive 3 lives, while Unconventional Factions receive 4. Additionally, once a specific role has exhausted all of its allotted lives based on the faction’s limitations, that role becomes unavailable for the remainder of the round.
10-2This system promotes personal accountability and team-oriented decision-making. It encourages players to value survival, coordinate effectively, and assist wounded teammates whenever possible. It also supports more aggressive playstyles for Unconventional Forces. A life is expended each time a player dies, though deaths at the Forward Operating Base (FOB) do not consume one.
10-3The Forward Operating Base (FOB) serves as the main base spawn for all factions and is established automatically at the start of each match. The FOB should be viewed primarily as the team’s initial staging area, located well outside the Area of Operations. It is also the back up spawn location should an element be wiped from the AO.
10-4Squads in Bellum rely on the Reconstitution mechanic to respawn teammates directly in the field. This ability is available to both Squad Leaders and Fireteam Leaders. To Reconstitute, the leader must have at least one ambulatory squadmate nearby and must not be in contact with the enemy. ● Squad Leaders can reconstitute their entire squad. ● Fireteam Leaders can reconstitute their fireteam and the Squad Leader.
10-5The Troops-In-Contact system reinforces squad cohesion, encourages elements to break contact, and ensures that leadership remains critical to maintaining combat effectiveness on the ground. Leadership may not perform Reconstitution while any of the following apply: ● Engaged by the enemy or actively engaging the enemy. ● Actively wounded.
Leadership may not perform Reconstitution while:
“Find, Fix, Finish.”
11-1Attrition is Bellum’s foundational game mode, built to distill platoon-scale warfare down to its core elements: small-unit tactics and inter-squad coordination. Rather than capturing points or completing timed objectives, teams in Attrition battle to exhaust the opposing force’s Manpower reserves through decisive engagements across the Area of Operation (AO). Every kill, maneuver, and tactical decision directly impacts a team’s ability to maintain combat effectiveness. Attrition creates the space for players to focus on squad and game fundamentals without the distraction of complex objectives.
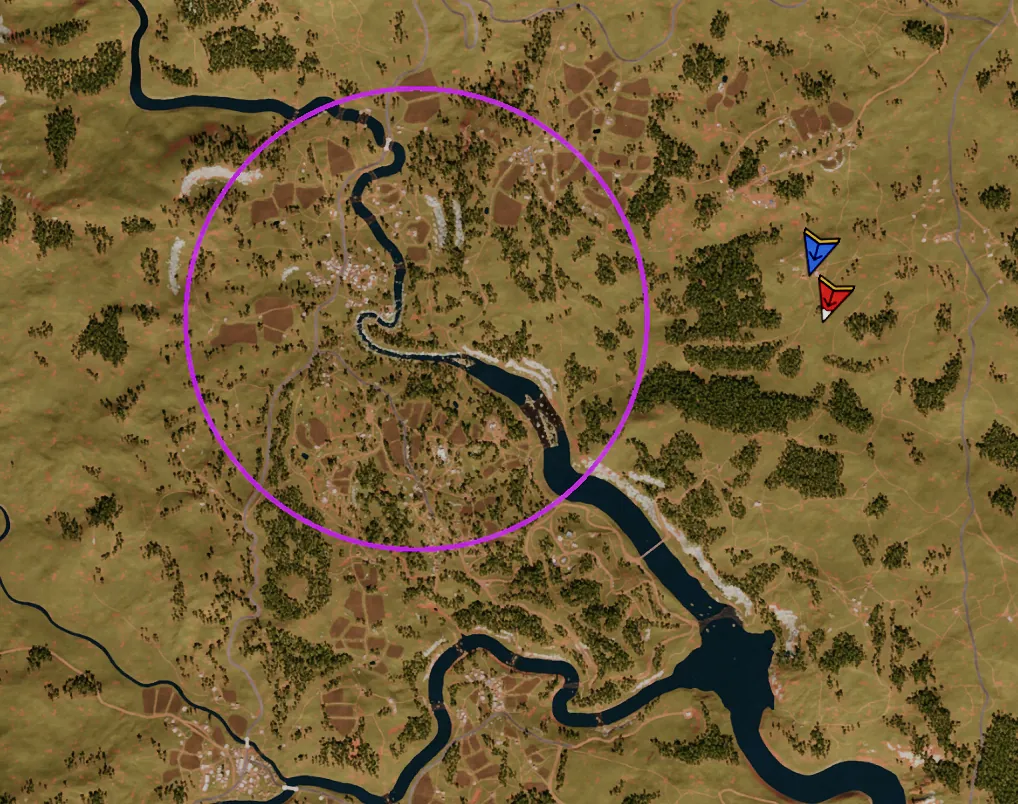
11-2The Area of Operation (AO) is the designated play space for all game modes in Bellum and is denoted by a purple circle. It defines where scoring occurs and establishes the primary engagement zone for the match. In Attrition, teams gain Influence, a sole scoring resource, by maintaining a significant numerical advantage within the Area of Operation. Influence is also weighted more heavily for players who are closer to the center of the AO, forcing teams to fight over that terrain. If a team maintains this advantage long enough to reach 100% Influence, they win the match. However, this outcome is rare, as both sides are usually locked in a numerical stalemate until a decisive engagement shifts the balance. Designer’s note: Influence primarily serves as a mercy mechanic, ensuring that if one team is decisively or repeatedly pushed out of the AO, the match concludes swiftly. It also compels teams to contest the central area of AO, as pursuing engagements outside or edges of the AO risks defeat via Influence.
11-3Most games of Attrition are not ended by reaching the Influence cap, but by the depletion of enemy Manpower. Each faction is allocated a total Manpower reserve, determined by both its faction type and the number of players on the team. Conventional Forces are given 3 lives per player, while Unconventional Factions receive 4. When a faction’s total Manpower is reduced to 40% of its total reserve, they are considered combat ineffective, triggering the QRF Phase and ending the match.
11-4The Quick Reaction Force (QRF) Phase serves as the transitional stage between a team achieving a victory condition and the formal conclusion of an Attrition match. Its purpose is to create a natural and immersive end-state to the battle rather than an abrupt cutoff, allowing both sides to experience the final moments of combat as a cohesive narrative event.
11-5During this phase, the defeated team is given a brief window to regroup and exfiltrate the Area of Operation, while the victorious force is tasked with pursuing and destroying any remaining opposition. During the QRF Phase a watch and B-TAK notification is sent to all users: ROUT means you were victorious and to continue to press the advantage while EXFIL means your element was defeated and to exfiltrate the AO.
11-5In future iterations, as Bellum’s progression systems evolve, the QRF Phase will gain additional significance factoring in remaining Manpower, casualties, and exfil success to affect post-match rewards and potentially campaign outcomes. This ensures that every life spent or saved carries weight, making the closing moments of battle as meaningful as the first engagement. Designer’s note: The current QRF phase is extremely WIP and will be dramatically expanded on with time.
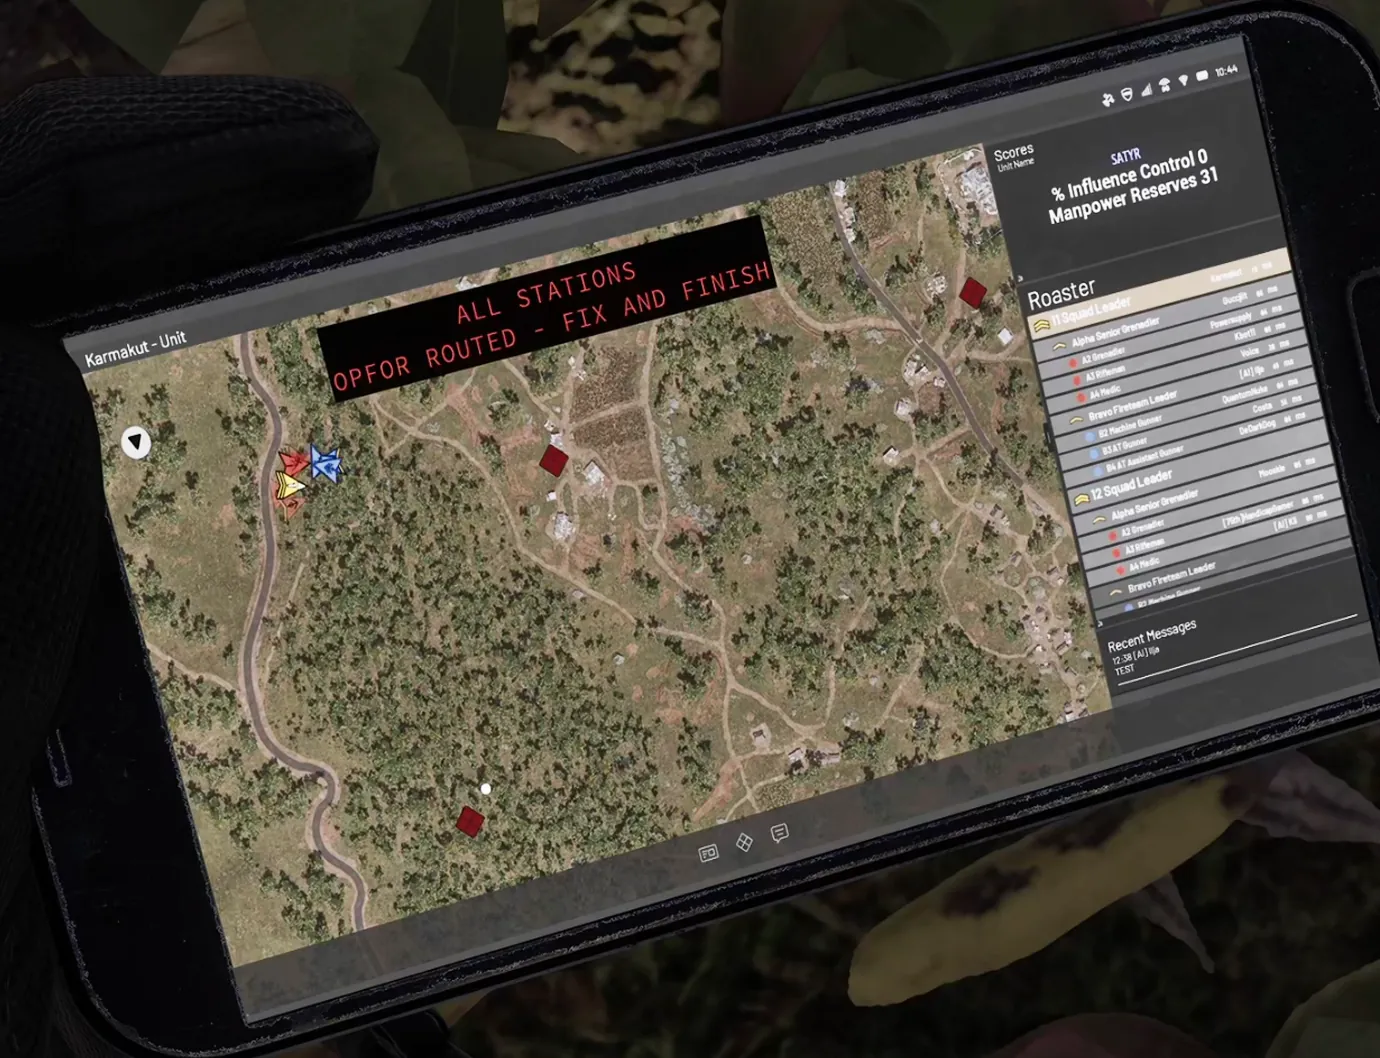
12-1Exploitation is Bellum’s second game mode built around conventional raids, intelligence gathering, and asymmetric pressure over time. Just like Attrition, the win conditions for Exploitation are either the depletion of enemy manpower reserves, or the generation of Influence to 100%.
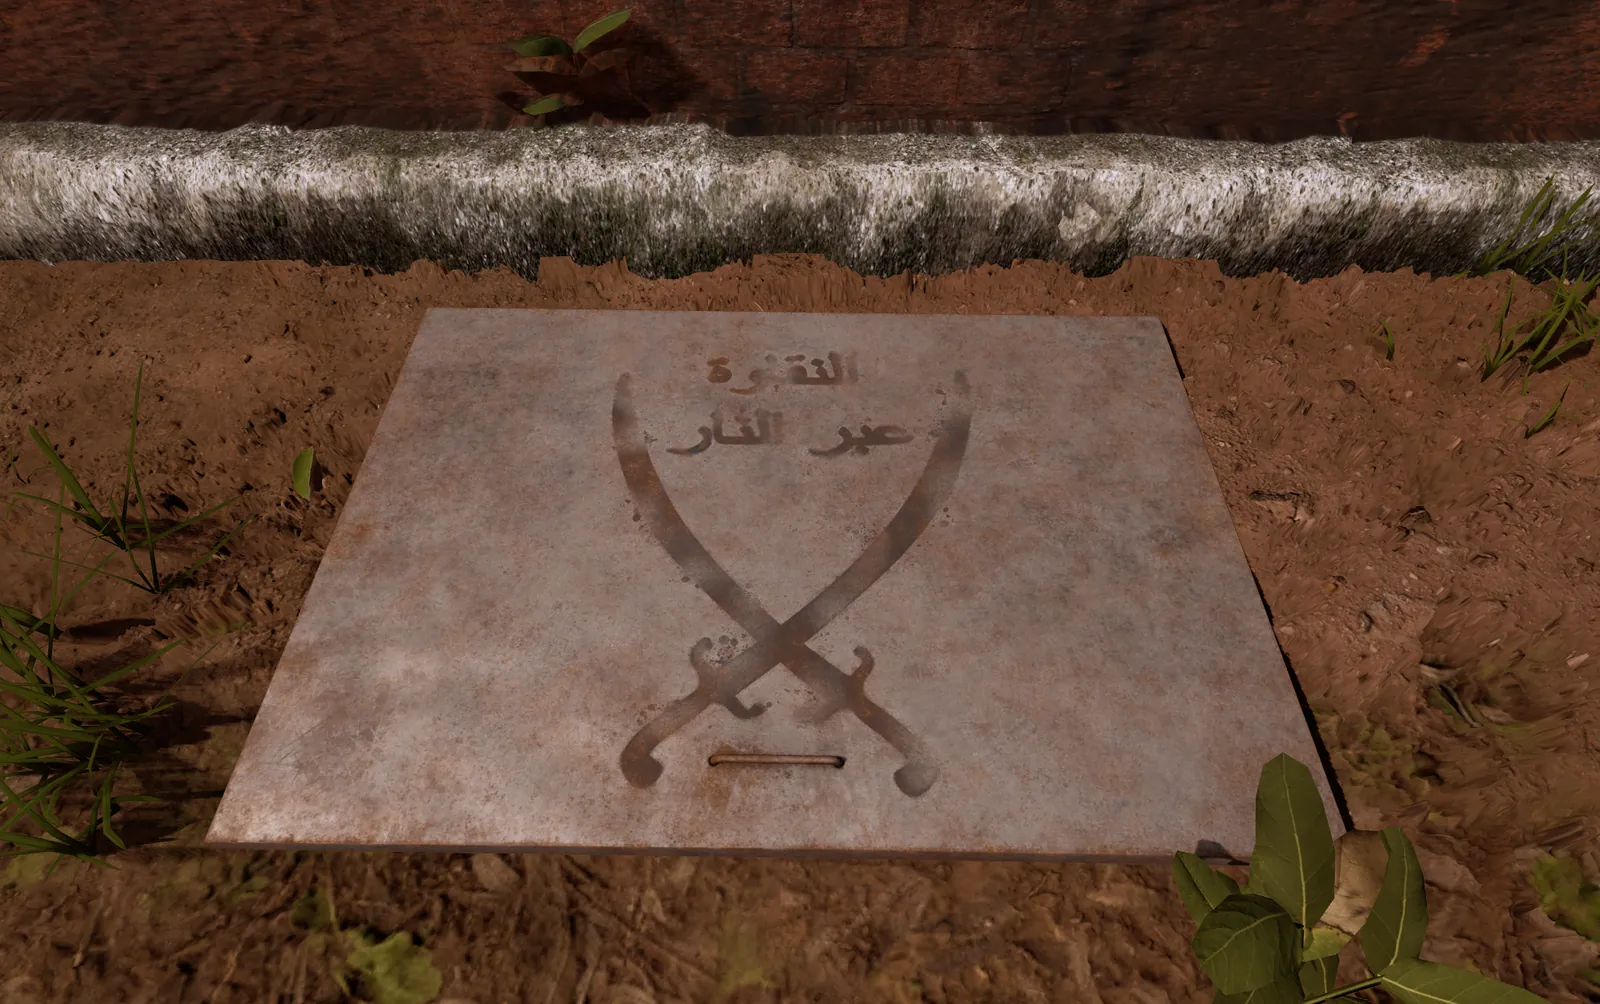
12-2In this mode, Insurgent forces are tasked with establishing and protecting caches throughout the Area of Operation. These caches are placed by Irregular squad and platoon leadership and may be hidden anywhere within the AO, provided each one is positioned at least 200 meters apart from any other cache. Irregular forces have until the AO “closes”, and the purple circle fills, to place down their caches. Their placement matters greatly, because each cache generates Influence based on how much of its area effectively covers the AO without overlapping the area of another cache. The more efficiently these caches are spread across the battlespace, the more Influence the irregular force can accumulate. If left undiscovered and undisturbed for too long, that steady Influence generation will eventually end the match in their favor.
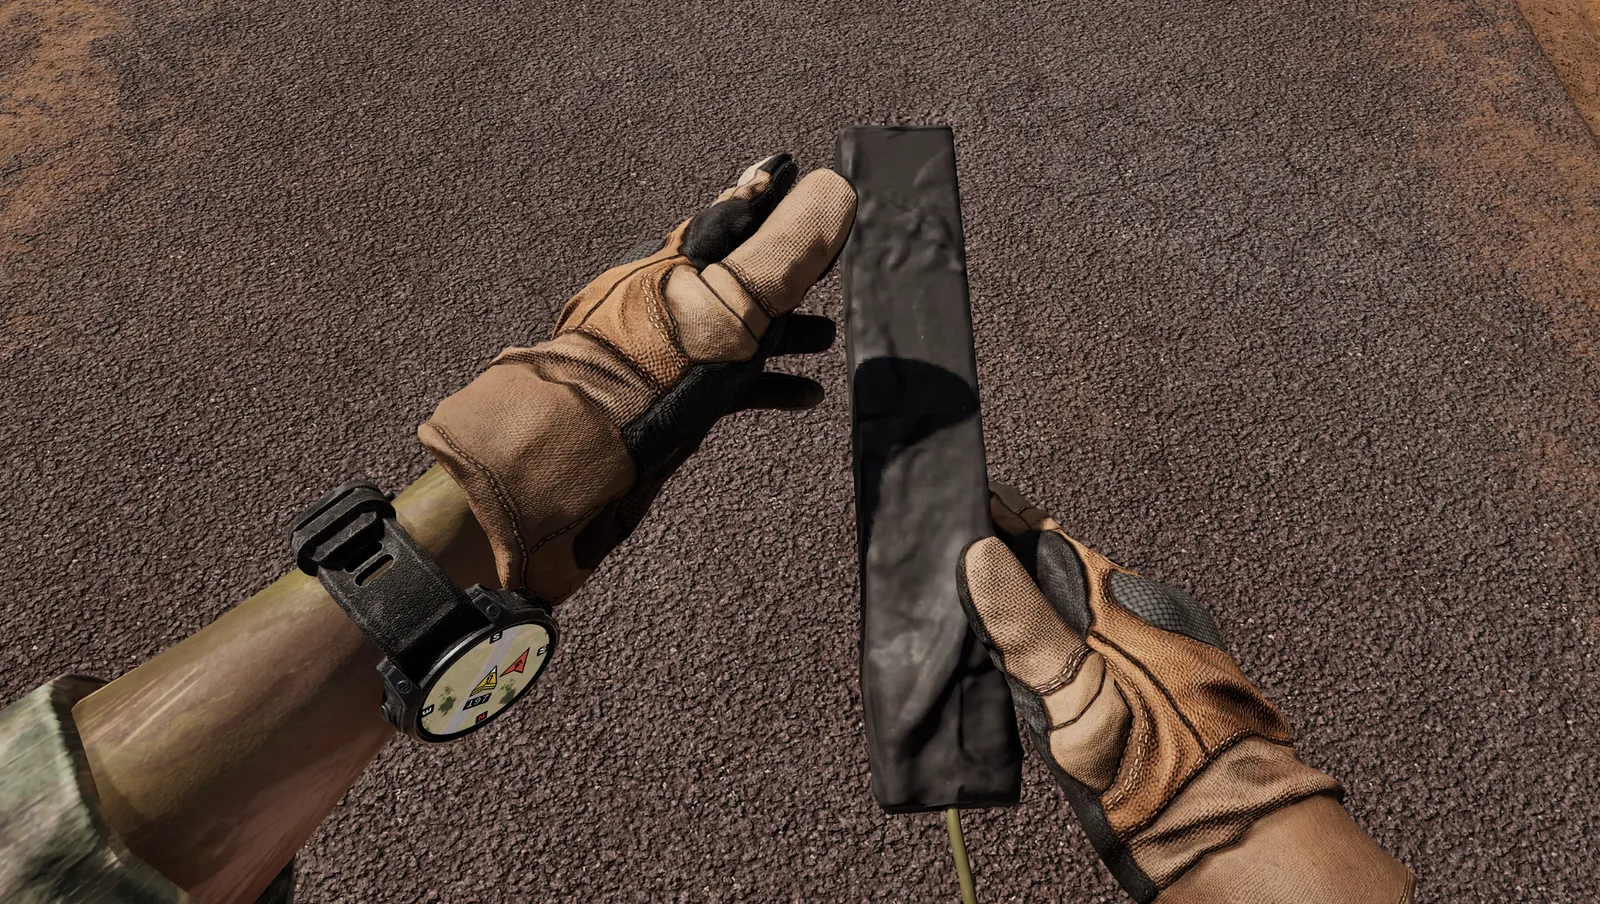
12-3For Conventional forces, Exploitation is about hunting down and dismantling that hidden network before it reaches a tipping point. They do not begin with exact knowledge of cache locations and must instead build that picture through battlefield action. By killing, capturing, and searching OPFOR personnel, conventional troops gather intelligence that helps narrow down where enemy caches may be hidden. From there, they must use coordination, deduction, and aggressive action to locate and destroy the caches before irregular Influence becomes overwhelming. Conventional forces can destroy these caches with either explosive charges carried by squad leadership, or with the use of rockets. After the destruction of 2 caches, or if there are no caches left in the AO, Conventional forces win.
12-4The result is a mode that pits concealment and territorial shaping against reconnaissance and targeted elimination, forcing both sides to think beyond simple firefights. Irregular forces are rewarded for smart placement, deception, hit and run tactics, and ambushes, while Conventional forces must methodically turn combat success into actionable intelligence and decisive strikes.
Bellum is built on coordination. Individual skill matters, but the strength of a platoon comes from how effectively its elements support one another. Fireteams should move and fight as unified groups rather than as lone riflemen chasing kills, and squads should communicate and cross-support within the platoon. This becomes especially critical in the respawn and reconstitution system, where losing your entire squad at once is severely punishing. Every player has a responsibility to keep the element alive and combat effective, and maintaining your leadership is essential to preserving respawn capability in the AO. When your team functions as a single, cohesive unit rather than isolated individuals, you become far more resilient and significantly more dangerous.
Situational awareness is survival. The Area of Operations is dynamic and threats can come from any direction. Small mistakes in positioning like floating in the open, exposing a flank, or advancing without reconnaissance can turn a promising engagement into a sudden ambush. Constantly scan your surroundings, listen for movement or gunfire, and use terrain to your advantage. Even when stationary, maintain a security posture and think about where the enemy could be. Vigilance keeps you alive, and disciplined positioning keeps your squad from being overrun.
Communication is what keeps a squad organized and effective. Call out what you see, where you are, and what you need, but keep it clear and to the point. You don’t need to narrate everything, just provide information that the rest of the team can act on. Let your medic know the severity of your injuries so they can plan treatment. Let your Squad Leader know your status and what you’re observing. Always confirm friendly positions before engaging to avoid accidental fratricide. In Bellum, clear communication reduces confusion, prevents unnecessary losses, and keeps the squad working as one.
Bellum is one of the few tactical shooters where breaking contact is often a necessary and deliberate decision. The Reconstitution system makes survival a shared responsibility. A squad’s ability to return to the fight depends on at least part of its leadership remaining alive. A total squad wipe removes that capability entirely, placing immense importance on timely withdrawals and the preservation of command. Knowing when to disengage, pull back to cover, break line of sight, and regrouping under leadership is just as vital as knowing when to press the assault. Every member must maintain situational awareness, reading the flow of firefights. In Bellum, a disciplined retreat is a tactical choice that keeps your squad in the fight and prevents a full redeployment back to the Forward Operating Base.
The U.S. Army's premier light infantry — exceptional firepower, robust medical capabilities, body armor. A Ranger platoon consists of three Rifle Squads and one Weapons Squad with medium machine guns and heavy anti-tank systems. Excels when squads communicate, synchronize fires, and execute deliberate assaults.
Maintain tight coordination between squads. Ensure mutual support across the platoon to avoid being overrun. Deploy the Weapons Squad cohesively as overwatch — or attach gun teams individually to Rifle Squads to enhance their firepower. Balance overwhelming firepower with the cohesion that defines the Regiment.
Ex-special operations veterans, contractors, and opportunists. Pragmatic and unrestrained. Looser standards, high autonomy, results over regulation. Four line squads organized into assault and support fireteams. Flexible command culture that rewards initiative and aggression.
Mobility, aggression, and rapid exploitation of enemy weaknesses. Each squad carries enough firepower to suppress, maneuver, and eliminate without external support. Seize the initiative — exploit speed and superior squad-level firepower to outmaneuver heavier forces, striking before they can reorganize.
Tribal militias, warlords, and ideological cells under a loose banner of resistance. Decentralized, deeply embedded in local population, intimate knowledge of terrain. Lightly equipped with captured, improvised, and black-market weaponry. Compensate through numbers, speed, and asymmetric warfare.
Patience, positioning, and controlled aggression. Disperse elements to reduce detection. Establish small observation posts overlooking likely avenues of approach. When an isolated enemy is confirmed, swarm it with overwhelming numerical superiority. Make every small element appear larger than it is — employ deception and timing to amplify your presence.